

Learn how to enable hover preview Apple Pencil Pro on iPad, customize your pointer settings, and fix common issues with this practical step-by-step guide.
The Apple Pencil Pro brings a massive leap forward in precision and workflow efficiency for users. Among its standout capabilities, the hover feature gives you a real-time preview of your brush size, color opacity, and tool orientation before your stylus tip ever makes physical contact with the glass screen.
Getting this setting running seamlessly requires specific iPad hardware compatibility alongside a quick pass through iPadOS settings. When correctly configured, hover transforms how you interact with apps like Procreate and Goodnotes.
CONTENTS:
- What is Apple Pencil hover preview and how does it work?
- How to enable hover preview Apple Pencil Pro in iPadOS
- Key settings to customize your Apple Pencil hover experience
- Practical fixes when Apple Pencil Pro hover preview is not working
- Compatible iPad models for Apple Pencil Pro hover
- Frequently asked questions
- Final thoughts
What is Apple Pencil hover preview and how does it work?
Hover preview relies on signals transmitted between the custom chip inside the Apple Pencil and the digitizer embedded within supported iPad displays. As you bring the tip within 12 millimeters of the screen, iPadOS detects the precise position, distance, and tilt of the stylus.

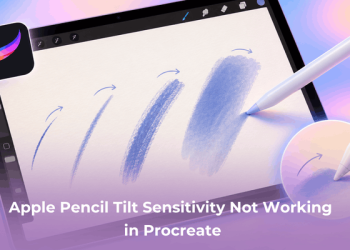
Unlike traditional touch interactions where you drop a brush stroke blind, hover casts a subtle shadow or cursor mark indicating your exact landing spot. It also updates dynamically as you adjust pressure or rotation, saving you from constant undo steps.
How to enable hover preview Apple Pencil Pro in iPadOS
Enabling Apple Pencil hover takes only a few taps inside your iPad system settings. Follow these quick steps to make sure the feature is toggled on and customized to your workflow.
Step 1: Pair your Apple Pencil Pro
Snap your Apple Pencil Pro onto the magnetic connector located on the long edge of your iPad. Ensure Bluetooth is active so the system recognizes the stylus instantly.
Step 2: Open Apple Pencil settings
Launch the Settings app on your iPad screen. Scroll down the left sidebar menu and tap Apple Pencil.
Step 3: Toggle on hover features
Locate the section labeled Hover. Turn on the switch for Show effects when using Pencil. This enables the real-time brush ring, pointer glow, and tool preview overlay.
Step 4: Enable extra interaction controls
Directly underneath the main toggle, activate Show shadow. This displays a realistic shadow matching your selected tool shape, which gives you instant spatial awareness while sketching or sketching out line work.

Key settings to customize your Apple Pencil hover experience
Fine-tuning your pointer behavior ensures the hover cursor remains helpful without creating visual clutter during complex artwork.
-
Disable double-tap hover preview: If switching tools while floating above the screen feels jarring, turn off shortcut previews inside your specific app preferences.
-
Adjust pointer distance: While iPadOS sets the hardware detection distance to 12 mm automatically, keeping your stylus tip slightly angled improves hover accuracy across canvas edges.
-
Customize brush size feedback: Apps like Procreate allow you to show or hide the active outline ring while hovering, helping you maintain a clean view of detailed line art.
Practical fixes when Apple Pencil Pro hover preview is not working
Hardware glitches, software bugs, or thick screen accessories often block the signal required for distance sensing. Here are practical fixes used by experienced iPad creators to restore hover instantly.
Clean the screen and inspect your screen protector
Thick tempered glass screen protectors or heavy grime build-up interfere with the electromagnetic signals transmitted between the digitizer and stylus. Swapping to a high-quality matte paper-feel protector or cleaning your display with a microfiber cloth often solves responsiveness drops immediately.
Reboot Bluetooth and force restart your iPad
A quick wireless reset clears communication glitches between the stylus and iPad OS. Turn off Bluetooth in Settings, wait ten seconds, turn it back on, and snap the pencil back onto the magnetic strip to re-pair.
Unpair and re-attach the nib
Unscrew the plastic tip of your Apple Pencil Pro slightly and tighten it back into place. A loose nib disrupts the internal sensor array responsible for tracking proximity and pressure sensitivity.

Compatible iPad models for Apple Pencil Pro hover
Apple Pencil Pro hover functionality requires specific iPad display hardware with high-frequency digitizers. The feature works natively on the following devices running iPadOS 17.5 or later:
-
iPad Pro 11-inch (M4)
-
iPad Pro 13-inch (M4)
-
iPad Air 11-inch (M2)
-
iPad Air 13-inch (M2)
Older iPad Pro and Air models with earlier Apple Pencil generations may support basic hover preview if equipped with M2 chips, but the advanced squeeze and barrel roll features remain exclusive to the Apple Pencil Pro lineup on current M-series iPads.
Discover More:
- Fix Apple Pencil Handwriting to Text Wrong Language
- Apple Pencil Not Working with Magic Keyboard? Try These Fixes
Frequently asked questions
Why can’t I see the Apple Pencil hover settings on my iPad?
Your iPad model may lack the necessary digitizer hardware, or your system software needs an update. Ensure your device runs iPadOS 17.5 or higher and matches the supported M-series iPad list.
Does Apple Pencil hover preview drain battery faster?
The proximity sensors consume a negligible amount of battery power. Leaving hover enabled all day causes no noticeable impact on your iPad or Apple Pencil charge levels.
Can I turn off hover preview for specific apps?
Yes. Most major drawing applications include individual toggles inside their internal preferences menu, allowing you to keep system-wide hover active while turning off visual brush outlines in specific tools.

Final thoughts
Enabling hover preview on your Apple Pencil Pro takes just a moment, yet it completely elevates precision when sketching, editing photos, or taking notes. By pairing the right iPadOS toggles with a clean screen setup, you gain a smooth, intuitive workflow that lets you preview every stroke before touching the glass.