
Learn how to record iPad screen with internal audio clearly. Follow simple steps and capture app sound without background noise.
Capturing game highlights, recording video tutorials, or saving live streaming content directly on an iPad often requires recording crisp system sounds alongside the display. Built-in tools in iPadOS allow you to capture high-quality video along with internal system sound without downloading risky third-party software or paying for extra subscriptions.
Getting a clear recording without background noise or unwanted silence depends on understanding how iPadOS handles sound channels and Control Center shortcuts.
CONTENTS:
How to record iPad screen with internal audio
Apple includes a dedicated Screen Recording tool inside iPadOS that records both on-screen action and internal app audio natively. Setting up this feature properly ensures that game sound effects, music tracks, or app audio are captured digitally at maximum clarity.
Step 1: Add Screen Recording to Control Center
The recording tool needs to be readily accessible before you open the application you plan to capture:
-
Open Settings on your iPad.
-
Scroll down and select Control Center.
-
Find Screen Recording under More Controls and tap the green + icon beside it.
-
Verify that Screen Recording now appears under Included Controls.

Step 2: Configure internal sound capture
Understanding how the microphone toggle interacts with internal audio prevents common recording mistakes:
-
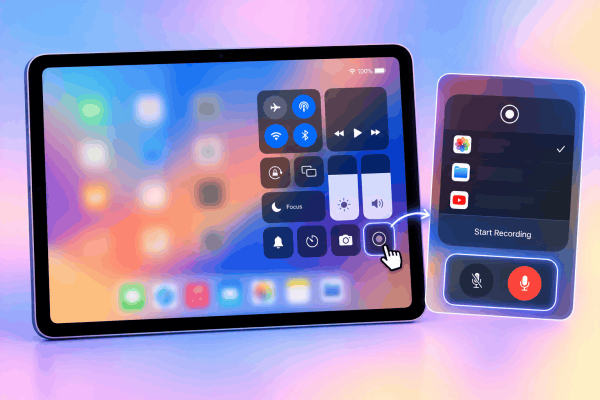
Swipe down from the top-right corner of your display to open Control Center.
-
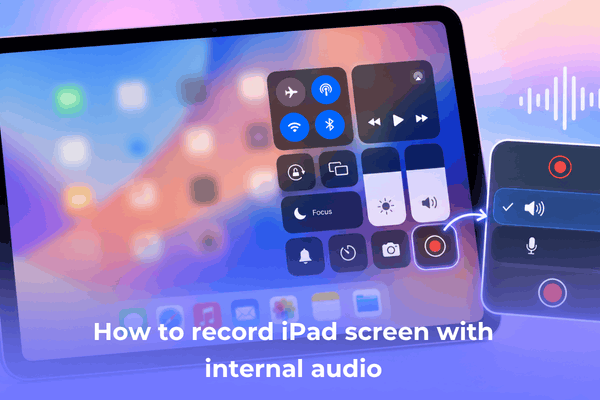
Press and hold the Screen Recording button (a solid circle inside a ring) until a pop-up menu appears.
-
Check the Microphone button at the bottom:
-
Microphone OFF (Default): Captures purely internal audio (game sounds, music, app sound effects) directly from the device without picked-up room noise.
-
Microphone ON: Captures internal audio plus external voice pickup through the iPad microphone.
-
Step 3: Start and stop your recording
Once configured, launching and concluding your video capture takes just a couple of taps:
-
Tap Start Recording from the pop-up menu. A 3-second countdown will begin.
-
Swipe away Control Center to return to your app. A small red recording indicator will appear in the top status bar.
-
To stop recording, tap the red icon in the top status bar and select Stop, or open Control Center and tap the red record button again.
-
Your completed video file automatically saves directly to the Photos app.

Related sub-keywords for iPad audio capture
To optimize search visibility and ensure complete topic coverage, several related terms help structure your recording workflow:
-
iPad screen recording no sound: Troubleshooting missing audio when videos turn out completely silent.
-
Record iPad screen with microphone and internal audio: Simultaneous commentary and game sound capture.
-
iPad screen recorder internal audio only: Pure digital audio capture isolated from ambient background noise.
-
Control Center screen recording iPad: Managing short cuts and system settings for quick video capture.
Keep Reading:
- How to Use iPad Stage Manager with Mouse Keyboard: Ultimate Guide
- How to Copy Text from Photos on iPad: Live Text Guide
Practical tips to avoid silent or distorted iPad recordings
A common issue during screen recording is ending up with a video that has no sound at all or distorted audio levels. A few quick adjustments before hitting record will guarantee reliable results.
Turn off Silent Mode and check physical volume
Leaving physical sound controls at zero remains a frequent cause of blank audio tracks. Make sure your iPad volume is turned up past 50% before initiating the clip.
On models equipped with a hardware mute switch, verify that Silent Mode is disengaged, as certain applications route sound to silence when hardware mute is active.
Disconnect Bluetooth headphones and accessories
AirPods, wireless headsets, and external Bluetooth speakers alter how iPadOS directs output sound channels. When wireless audio devices are active, iPadOS routes the audio stream away from the system screen recorder directly into the headset.
Disconnect Bluetooth audio devices inside Settings before recording to guarantee internal sound tracks get written directly to the video file.
Adjust app permissions for copyrighted audio
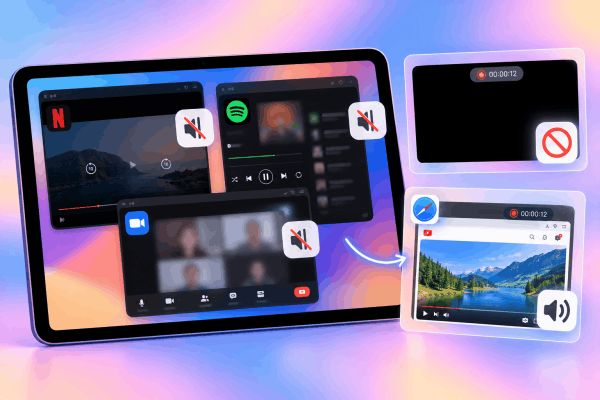
Certain media applications like Netflix, Spotify, or Zoom intentionally block internal screen recording to protect copyright or caller privacy.
When attempting to record protected content, iPadOS automatically mutes the internal audio channel or outputs a completely black screen. Using standard browsers or unprotected media apps avoids system-level capture blocks.
How to capture microphone commentary alongside internal audio
Creating gameplay videos, instructional material, or app walkthroughs usually demands speaking over internal app sound effects without drowning out your voice.
To record voice commentary over app playback, open Control Center, long-press the Screen Recording button, and tap the Microphone icon until it turns red with the label Microphone On. Position your iPad on a stable surface or stand while speaking.
Holding the device in your hands during recording frequently causes palm friction across the built-in microphone ports, generating harsh crackling noises that corrupt your voice track. Keeping game speaker levels around 60% prevents game music from overpowering your spoken commentary.
Frequently asked questions
Why is there no sound on my iPad screen recording?
Silent recordings usually occur because the iPad volume was turned down completely, Bluetooth headphones redirected the audio stream, or the app being recorded restricts audio capture due to digital rights management (DRM).
Can I record internal audio on iPad without picking up outside background noise?
Yes. Open Control Center, long-press the Screen Recording icon, and make sure the Microphone toggle is switched OFF. This forces iPadOS to capture internal digital audio directly while ignoring room sounds.
Where are screen recordings saved on iPad?
All finished screen recording videos automatically export to your native Photos app under Library and inside the dedicated Screen Recordings album.

Final thought
Recording your iPad screen with clear internal audio requires no extra apps once you understand how Control Center handles system sound channels.
Keeping Bluetooth accessories disconnected, adjusting output volume, and choosing the correct microphone setting guarantees high-quality audio capture every single time. Set up your shortcut today and capture smooth, professional-sounding screen recordings directly on your device.