

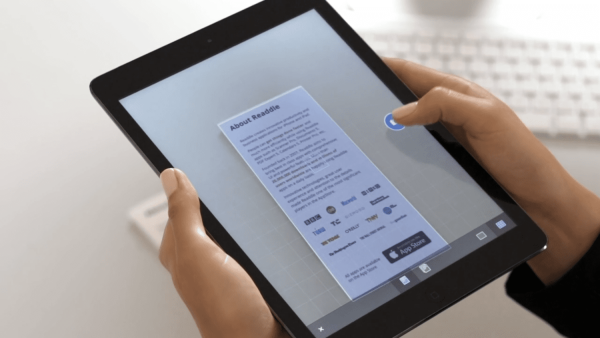
Learn how to scan documents with iPad with the most amazingly convenient ways. Turn your tablet into a digital scanner and keep every file organized with ease.
No need for a flatbed scanner, your iPad can take care of it effortlessly. The process feels smooth, and everything happens right inside your device.
Whether you’re dealing with class materials or important papers for work, your iPad turns them into clean digital files in seconds. Once you try it, you’ll see how practical it can be for keeping your documents neat and easy to find.
CONTENTS:
- Why scanning with iPad makes sense?
- What you’ll need before you start
- How to scan documents using Notes app
- How to scan documents with iPad using Files app
- Bonus: using the Camera app (less common but useful)
- Editing, saving, sharing and exporting your scan
- Tips for better scan quality
- Troubleshooting: when scans don’t look right
- Faq: your scan questions answered
- Final thoughts
Why scanning with iPad makes sense?
You’re already carrying the device. Why pull out another tool? With your iPad:
-
You can scan and save a document in minutes.
-
You don’t need extra hardware.
-
You can edit, crop, annotate, and share the scan right away.
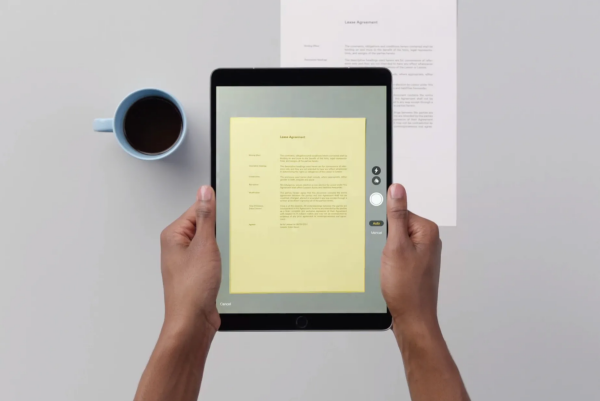
It’s fast, portable, and works whether you’re in a dorm room, a cafe, or on the go. Apple’s built-in scanner functions (in Files, Notes, or Camera) help you ditch the paper jam and keep things digital.
What you’ll need before you start
-
Make sure your iPad is updated to a recent version of iPadOS.
-
Have good lighting and flat surface for the document.
-
Make sure the document you’re scanning is clean, and the paper lies flat.
Everything else is built into iPad – no extra hardware required.
How to scan documents using Notes app
This is the quickest method when you just need a basic scan.
-
Open Notes.
-
Tap the Create icon (or open an existing note).
-
Tap the Camera icon => select Scan Documents.
-
Position your iPad so the paper appears in view. The yellow border will appear when the document is detected. Tap the shutter button (or let it auto-capture).
-
Adjust the corners if needed, then tap Keep Scan.
-
If you have more pages, scan them. Then tap Save.
-
To export: tap the scanned document in your note => Share icon => choose Save to Files or email it.

This method is fast for tasks like saving a receipt or signing a contract right from your iPad.
How to scan documents with iPad using Files app
If you want more control – like saving scans directly into folders or your iCloud Drive – use Files.
-
Open Files => Browse to the folder where you want to save.
-
Tap the three-dot icon at top right => choose Scan Documents.
-
Position the document and scan exactly like you did in Notes.
-
Tap Save, name the file, pick a location (iCloud, On My iPad, external drive).

With Files you get direct access to your folder structure so it’s easier to organize and share clean files later.
Bonus: using the Camera app (less common but useful)
If you prefer just snapping a photo and converting it, Apple supports scanning via the Camera too.
-
Open Camera.
-
Switch to Document mode if available (on newer iPads).
-
Hold the iPad steady, align the document, tap to capture.
-
After capture you might crop and adjust.
This method is less ideal if you care about clean edges or OCR, but it works in a pinch.

Editing, saving, sharing and exporting your scan
Once scanned, you’ll want to clean it up and share or save it properly.
-
Crop and rotate the image so it’s straight and aligned.
-
Change filter or color mode (“Color”, “Grayscale”, “Black & White”) depending on your document.
-
Rename the file so you can find it later.
-
Save it to Files => iCloud Drive or an external drive for long-term access.
-
Share by tapping the Share icon: you can send via email, upload to cloud service, attach to form.
If your scan is too large for email, use the Share => Save to Files => Compress PDF or a third-party compression tool.
Tips for better scan quality
-
Place the document on a contrasting background so the edges are easier to detect.
-
Make sure there’s even lighting; avoid shadows. Reddit users note shadows often spoil scan quality.
-
Hold your iPad directly above the document rather than at an angle.
-
If your scan ends up too large, choose “Black & White” mode or compress the resulting PDF.
Troubleshooting: when scans don’t look right
“Document edges not detected”
Make sure the paper is flat. Move to better lighting. Try manual capture instead of auto.
“Scan too dark/blurry”
Clean the camera lens. Avoid motion while capturing. Choose “Flash On” if needed.
“File size huge”
Switch filter to Black & White. Use Files app to compress the PDF before sharing.
“Can’t find Scan Documents option”
That option may be hidden if iPadOS is outdated or Notes/Files app permissions are limited. Update iPadOS and check permissions in Settings => Notes or Settings => Files.
Discover More:
- How to share files between iPad and Mac: The complete guide you actually need
- How to use voice control on iPad: The friendly, full guide
Faq: your scan questions answered
Q: Can I scan multiple pages into one PDF?
A: Yes. Both Notes and Files allow you to add pages before tapping Save.
Q: Will my scans be searchable text (OCR)?
A: The built-in scanner creates standard image/PDF files. To get searchable text you’ll need a third-party OCR app.
Q: Can I sign a scanned document?
A: Yes. After scanning, tap the Share icon => Markup => use Apple Pencil or finger to add signatures.
Q: Can I scan directly to my Mac?
A: Yes, with Files => Connect to Server or use Import from iPhone/iPad via Preview on Mac. But the easiest route remains scanning on iPad and saving to iCloud Drive.
Q: Is there a free app better than the built-in tools?
A: Built-in tools are excellent. Some third-party apps offer advanced features like OCR, cloud integrations, or batch scanning if you do scanning frequently.

Final thoughts
If you’ve ever hesitated to digitize your documents because you thought you’d need special hardware, your iPad is ready. Scanning documents with iPad is intuitive and fast.
I find myself using Notes for quick stuff and Files when I want to organize a project cleanly. The quality might not match a dedicated office scanner for high-volume jobs, but for most of us it’s more than enough.
Next time you need to scan something, just open your iPad, pick the method that fits your need, and you’ll be done before you know it.