

Troubleshoot LumaFusion rendering error and failing to export with these proven, practical solutions to get your video edits exporting smoothly.
Exporting a finished video project should feel like reaching the finish line after hours of precise cutting, color grading, and audio tweaking. Nothing halts that momentum faster than seeing an unexpected popup notification declaring an export failure midway through rendering.
If you encounter a LumaFusion rendering error and failing to export, you are working with an editor that demands significant system memory and real-time processing power. When media files get complex or the system hits a temporary resource wall, the export pipeline breaks.
Here is a practical troubleshooting guide designed to get your project across the finish line.
CONTENTS:
Understanding why LumaFusion fails during export
LumaFusion relies heavily on real-time hardware decoding and encoding. When an export fails, the app usually encounters a frame it cannot render fast enough, a corrupted cached media clip, or an unresolvable hardware memory spike.

Understanding the root cause helps you select the right solution instead of guessing randomly.
-
Insufficient RAM allocation: High-resolution timelines with multiple video layers can exceed available system memory.
-
Corrupted transition or effect cache: Pre-rendered effects files can become corrupted over time, leading to sudden export crashes at specific timestamps.
-
Mixed frame rates and variable codecs: Combining media from different sources—like screen recordings, phone footage, and action cameras—creates rendering friction.
-
Insufficient storage space: The device requires extra temporary workspace beyond the calculated size of the final video file.
-
Corrupted source media: A single damaged frame in a video clip can stall the entire rendering engine.
How to fix LumaFusion rendering error and failing to export
When faced with a stuck progress bar or an immediate error message, run through these step-by-step solutions to isolate and eliminate the issue.
Clear the LumaFusion optimization cache
LumaFusion generates temporary cache files to keep playback smooth while editing. Over time, these files accumulate or become slightly corrupted, which triggers render errors when compiling the final output.
-
Open LumaFusion and tap the Help/Settings gear icon in the bottom corner.
-
Select Preferences or navigate to the Cleanup tab.
-
Tap Clear Unused Optimization Files and Clear Render Cache.
-
Restart the app and attempt the export again.
Clearing these temporary files forces LumaFusion to re-render your transitions and titles cleanly during the export phase.

Perform a standard restart of your device
A quick device restart clears temporary RAM bottlenecks that build up during long editing sessions.
-
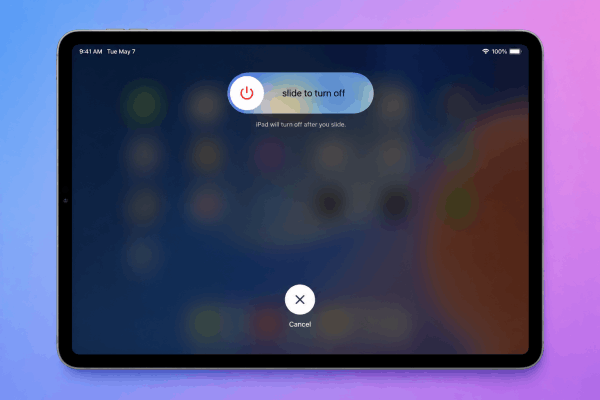
Press and hold the Power button along with either Volume button (or just the Top button depending on your iPad/iPhone model) until the power-off slider appears.
-
Drag the Slide to power off control to the right.
-
Wait roughly 30 seconds for the device to shut down completely.
-
Press and hold the Power button again until the Apple logo appears to turn it back on.
Reopening LumaFusion after a fresh boot frees up max system resources dedicated solely to the rendering task.
Isolate the exact timestamp causing the failure
If the export constantly fails at the exact same percentage (for example, stopping completely at 42%), the issue is almost certainly tied to a specific clip, transition, or effect at that spot on the timeline.
-
Note the percentage where the render stops.
-
Calculate the corresponding time code on your timeline (e.g., 42% of a 10-minute timeline is around the 4:12 mark).
-
Zoom in closely to that section of your main track and overlay tracks.
-
Temporarily disable or delete the transition, title element, or third-party plug-in active at that moment.
-
Attempt a quick test export of just that small section using the timeline in/out points.
Replacing or slightly trimming the problematic clip usually resolves persistent timestamp crashes instantly.
Adjust export settings and codecs
High-bitrate settings like ProRes or H.265 (HEVC) place immense pressure on the rendering pipeline. Lowering the processing strain slightly often bypasses rendering bottlenecks.
-
Switch Video Codec: Change from H.265 to H.264 (AVC). H.264 is far more stable during render passes across various mobile chipsets.
-
Lower the Bitrate Target: Switch the quality preset from “Extreme” or “Ultra” down to “Standard” or “High”.
-
Match Timeline Frame Rates: Ensure your export frame rate matches the primary media recorded on your project timeline (e.g., 30fps to 30fps).

Free up internal storage space
LumaFusion requires significant “scratch space” on your internal device drive to write temporary files during the export process. Having just enough space for the finished file size is rarely sufficient.
Ensure you have at least twice the estimated file size available as free space on your internal storage before hitting the export button. Transfer finished project backups or old raw footage off the main drive if storage runs low.
Keep Reading:
- iPad PIP Video Not Working? How to Fix Picture in Picture Fast
- LumaFusion vs DaVinci Resolve: Which iPad Video Editor Wins?
Advanced workflow strategies for smooth video rendering
Adopting a few structural editing habits prevents export problems before they ever appear on your timeline.
| Strategy | Action | Benefit |
| Consolidate mixed frame rates | Convert variable frame rate (VFR) clips like screen recordings to constant frame rate (CFR) before editing. | Eliminates audio drift and engine lockups during export. |
| Export in smaller chunks | Mark 2-minute sections using In/Out markers and export them individually. | Prevents total loss if an export fails; combine chunks in a fresh sequence. |
| Flatten multi-track titles | Render complex stacked text overlays into a single video file first. | Reduces real-time processing demands during the final export pass. |
| Offload active background tasks | Close all secondary apps in the multitasking switcher before rendering. | Maximizes physical memory allocation strictly for LumaFusion. |
Frequently asked questions
Why does LumaFusion say there is an error rendering a frame?
This usually indicates a corrupted media frame within a clip, an incompatible video codec, or an overloaded GPU effect applied to that specific timestamp. Trimming or re-importing the affected media clip resolves the problem.
Does exporting to external drives cause rendering errors?
Yes. Exporting directly to external SSDs or flash drives can fail if the cable connection experiences a micro-disconnection or if the drive formatting is inconsistent. Export to internal device storage first, then transfer the final file to external drives afterward.
Will clearing the render cache delete my actual project files?
No. Clearing the render cache only deletes temporary preview and optimization files generated by LumaFusion. Your original media, cuts, edits, titles, and project files remain completely untouched.

Final thought
Encountering a rendering hiccup during export can feel frustrating, but systematic troubleshooting almost always recovers the project. With practical adjustments above, your timeline will export cleanly and efficiently every time.