


Procreate fill tool flooding entire canvas? Fix color drop bleed, layer issues, and threshold settings with these practical solutions.
Dropping a color onto your digital line art only to watch it flood the entire canvas is a major buzzkill for any digital artist. You spent hours perfecting your sketch, but the moment you drag a color swatch over, the whole page turns solid blue.
This issue usually comes down to a few hidden settings or layer configuration mistakes. Here is a clear breakdown of why your Fill tool is filling the whole page and how to fix it in seconds.
CONTENTS:
Why is your Procreate fill tool flooding entire canvas?
When you drop a color in Procreate, the app calculates color boundaries based on two factors: the opacity of pixels on your target layer and the threshold limit you have set.
If your line art has tiny openings, even just a couple of transparent pixels, the ColorDrop algorithm treats your lines as open paths and fills everything around them.
Another common reason involves threshold settings that are pushed too high, forcing Procreate to ignore thin lines entirely.
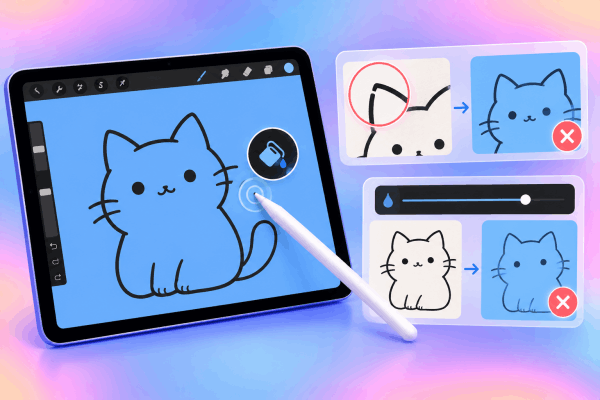
5 practical solutions to stop ColorDrop from leaking
Instead of manually redrawing your lines, try these 5 quick fixes to get your ColorDrop working smoothly again.
1. Adjust the ColorDrop Threshold
The most frequent cause of canvas flooding is an aggressive ColorDrop Threshold. When you drag a color into an area, Procreate displays a percentage bar at the top of your screen.
-
Drag your color swatch over the target area, but do not lift your Apple Pencil.
-
Hold the pencil still for a second until the ColorDrop Threshold bar appears at the top.
-
Slide your pencil to the left to decrease the threshold percentage.
-
Watch the color fill recede until it fills only your desired shape, then release your pencil.

Procreate remembers your last threshold percentage, so if you accidentally bumped it to 100% on a previous project, every new fill will flood the entire page until you turn it down.
2. Check and enable Reference Layer
When coloring line art, best practice dictates keeping your line work on one layer and your colors on a separate layer beneath it. If you try to drop color onto a blank lower layer without configuring your line art properly, the color has no boundary reference and will flood the whole screen.
-
Open your Layers menu.
-
Tap your line art layer to bring up the side menu.
-
Select Reference.
-
Create a new blank layer underneath your line art layer.
-
Drag and drop your colors onto this new layer.
Procreate now reads the lines from your Reference layer while keeping your colors cleanly isolated below.

3. Close invisible pixel gaps
Vector lines scale smoothly, but Procreate works with raster pixels. What looks like a solid black line to your eye might contain microscopic gaps when zoomed out.
-
Zoom in closely around the edges of the shape you are trying to fill.
-
Look for faint, semi-transparent pixels or tiny breaks in the stroke.
-
Use a solid, non-streamlined brush (like the Technical Pen) to close any open gaps on your line art layer.
-
Try dropping your color again.

If you prefer clean, open-style line work without manually closing every gap, lowering your threshold or using a thicker outline brush helps prevent accidental spills.
4. Verify layer opacity and blend modes
A layer set to a low opacity or an unusual blend mode can confuse color filling. For instance, dropping a bright color onto an Multiply layer or a semi-opaque layer can make the threshold system behave unexpectedly.
-
Tap the N (or current blend mode letter) next to your layer checkmark.
-
Ensure the layer Opacity slider is set to 100%.
-
Reset the blend mode to Normal to see if the fill boundary returns.
5. Clear selections or active Alpha Lock
An active selection or hidden Alpha Lock status can lock up your ColorDrop behavior. If you have an active selection mask outside your canvas view, Procreate will restrict or spill colors in unexpected ways.
-
Look at the top toolbar to see if the Selection tool (S icon) is highlighted.
-
Tap it to remove any active selections.
-
Check your target layer and swipe two fingers to the right to toggle off Alpha Lock if it is enabled.

Procreate ColorDrop fixes at a glance
| Issue | Quick Cause | Immediate Fix |
| Canvas turns solid color | Threshold set too high | Drag pencil left before lifting to drop threshold |
| Fills whole blank layer | Reference layer not enabled | Set line art layer as “Reference”, fill on new layer |
| Color leaks through lines | Microscopic gaps in line art | Zoom in and seal line endings with a hard brush |
| Uneven or splotchy fill | Low layer opacity / Blend mode | Reset blend mode to Normal, opacity to 100% |
Pro tips for cleaner line art fills
-
Use hard-edged brushes for ink work: Textured brushes like chalk, charcoal, or soft airbrushes leave feathered, semi-transparent edges. ColorDrop struggles to detect these soft boundaries, leading to line bleeding.
-
Master the ColorDrop Continue shortcut: After dropping a color, tap Continue filling with ColorDrop in the top bar. This lets you tap multiple areas sequentially without dragging from the color wheel each time.
-
Keep line art on high contrast: If your line art is ultra-faint, Procreate’s boundary detection struggles. Darken your sketch layer temporarily while applying base colors.
See More:
- Procreate brush stroke tapering glitch: How to fix stroke ends
- How to fix Procreate brush pressure delay on iPad
Frequently asked questions about Procreate Fill tool flooding canvas
Why does ColorDrop work on one canvas but flood another?
Procreate retains your last used ColorDrop Threshold across different canvases. If you cranked the threshold high for a textured artwork on one canvas, that same high setting will flood your next project until manually reduced.
What is the ideal ColorDrop Threshold percentage?
For clean, solid line art, a threshold between 50% and 70% usually offers the cleanest coverage without leaving pixelated white halos around the edges.
Can I fill an area without using ColorDrop?
Yes. You can activate the Selection tool, choose Freehand or Automatic, select the region you want, and tap Fill Layer inside the layer options menu.

Final thoughts
Dealing with a canvas that turns a single solid color is almost always tied to your threshold setting or an unassigned Reference layer. Save yourself time by working with clean line boundaries on a designated Reference layer, and your color workflow will stay smooth and hassle-free.